Docker
To run the ArcadeDB server with Docker, type this (replace <password> with the root password you want to use):
$ docker run --rm -p 2480:2480 --name my_arcadedb \
             --env ARCADEDB_SETTINGS="-Darcadedb.server.rootPassword=playwithdata" \
             --hostname my_arcadedb arcadedata/arcadedb:26.10.1
If there are no errors, Docker prints immediately the container id. You can use that id to stop the container, or execute some commands from it.
Pass ArcadeDB settings in ARCADEDB_SETTINGS and extra JVM flags in JAVA_OPTS. Docker
replaces an environment variable rather than adding to it, so putting -Darcadedb.* settings in
JAVA_OPTS would discard the garbage collector the image selects for you. Keeping the two apart means
your container runs the same JVM as one started with no environment at all (since v26.9.1).
|
With arcadedb.server.apiTokenRequireSecureTransport=true the server refuses to mint an API token over a plain-HTTP connection that does not come from the loopback address. The setting is false in 26.10.1 (an unprotected mint is only logged at WARNING) and is scheduled to default to true from 27.1.1. Once it is on, a container reached through a published port (-p 2480:2480) usually sees the Docker network gateway as the peer, not loopback, so Create Token in Studio on http://localhost:2480 is answered with a 412, and opening Studio "from the server host itself" does not help. For a local development container, either enable HTTPS or leave the check off with -Darcadedb.server.apiTokenRequireSecureTransport=false in ARCADEDB_SETTINGS. Do not turn it off for a server reachable from other machines. Behind a TLS-terminating reverse proxy, list the proxy in arcadedb.server.apiTokenTrustedProxies instead; see Create an API token.
|
To run the console from the container started above, use:
$ docker exec -it my_arcadedb bin/console.sh
ArcadeDB Console v26.10.1 - Copyrights (c) 2021 Arcade Data (https://arcadedb.com)

>
The ArcadeDB image can also be used with Podman, just replace docker with podman in the examples.
|
Quick start with the OpenBeer database
You can run ArcadeDB server with a demo database in less than 1 minute. Run ArcadeDB server with docker specifying the database to import as a parameter in the docker command.
Example of running ArcadeDB Server with all the plugins enabled (Redis, Postgres, Mongo, Gremlin) that download and install OrientDB’s OpenBeer dataset:
$ docker run --rm  -p 2480:2480 -p 6379:6379 -p 5432:5432 -p 8182:8182 --env ARCADEDB_SETTINGS="\
   -Darcadedb.server.rootPassword=playwithdata \
   -Darcadedb.server.defaultDatabases=Imported[root]{import:https://github.com/ArcadeData/arcadedb-datasets/raw/main/orientdb/OpenBeer.gz} \
   -Darcadedb.server.plugins=Redis:com.arcadedb.redis.RedisProtocolPlugin, \
                             MongoDB:com.arcadedb.mongo.MongoDBProtocolPlugin, \
                             Postgres:com.arcadedb.postgres.PostgresProtocolPlugin, \
                             GremlinServer:com.arcadedb.server.gremlin.GremlinServerPlugin" \
         arcadedata/arcadedb:latest
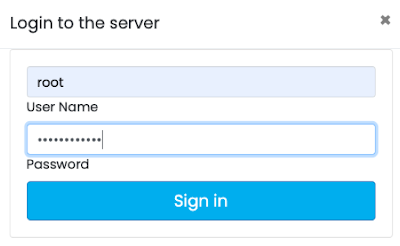
Now point your browser on http://localhost:2480 and you’ll see ArcadeDB Studio. Now enter "root" as a user and "playwithdata" as a password.
| User and password are specified in the docker command above. |
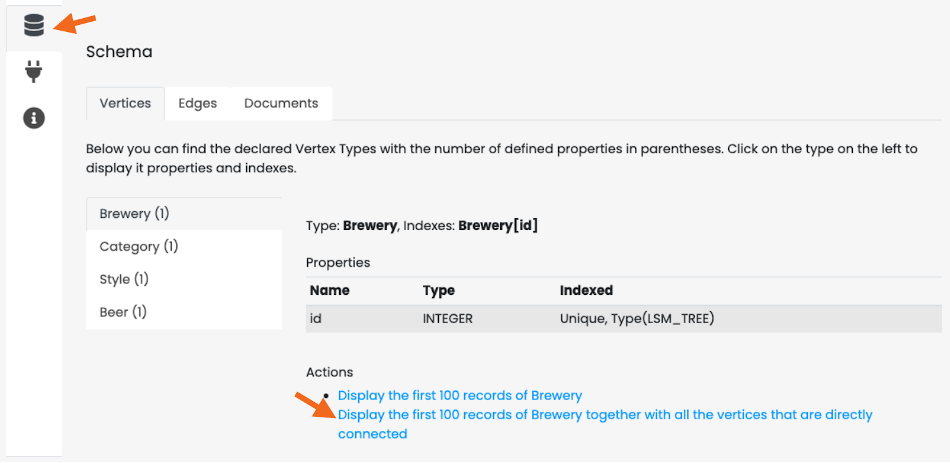
Now click on the "Database" icon on the toolbar on the left. This is the database schema. Click on "OpenBeer" vertex type and then on the action "Display the first 100 records of Beer together with all the vertices that are directly connected".
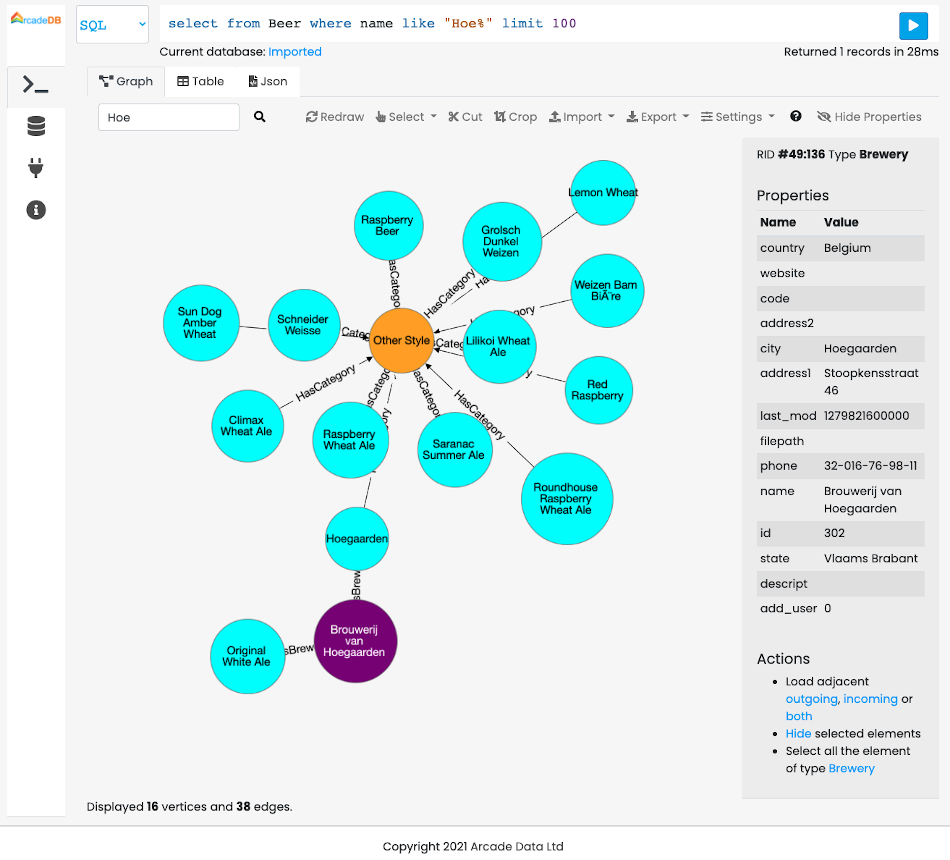
You should see the first 100 beers in the database and all their connections.
Persistence
By default, data created in a Docker container is lost when the container stops. To preserve your ArcadeDB databases beyond the container’s lifecycle, you need to configure persistent storage by mounting volumes.
Understanding ArcadeDB’s Database Directory
ArcadeDB stores its databases in the /home/arcadedb/databases directory by default. This is the path you need to mount to persist your data. You can customize this location using the -Darcadedb.server.databaseDirectory setting if needed.
Docker Volumes vs. Bind Mounts
Docker offers two approaches for persistent storage:
-
Docker volumes - Docker-managed storage sections on the host filesystem. Docker handles the storage location, permissions, and lifecycle. This is the recommended approach for most use cases as it’s more portable and easier to manage.
-
Bind mounts - Direct mapping to a specific path on your host machine. This gives you full control over the exact location of your data files and allows direct access to them from the host. Useful when you need to inspect, backup, or manipulate the database files directly.
See the Docker storage documentation for detailed setup instructions.
Persisting the Database Directory
The default path /home/arcadedb/databases contains all your database files. Mount this directory to make your data persistent. Here’s an example using a bind mount:
$ docker run --rm -p 2480:2480 --name my_arcadedb \
    -v /path/on/host/databases:/home/arcadedb/databases \
    --env ARCADEDB_SETTINGS="-Darcadedb.server.rootPassword=playwithdata" \
    --hostname my_arcadedb arcadedata/arcadedb:26.10.1
Replace /path/on/host/databases with your desired directory path. All database read and write operations will occur on this mounted volume.
If you prefer using Docker volumes instead of bind mounts, replace -v /path/on/host/databases:/home/arcadedb/databases with -v arcadedb-data:/home/arcadedb/databases where arcadedb-data is your chosen volume name.
|
Alternative: Custom Database Directory
If you need to change where ArcadeDB stores databases, use the -Darcadedb.server.databaseDirectory setting and mount your volume to match the new path:
$ docker run --rm -p 2480:2480 --name my_arcadedb \
    -v /path/on/host/databases:/mydatabases \
    --env ARCADEDB_SETTINGS="-Darcadedb.server.databaseDirectory=/mydatabases \
                     -Darcadedb.server.rootPassword=playwithdata" \
    --hostname my_arcadedb arcadedata/arcadedb:26.10.1
This example changes the database directory to /mydatabases and mounts the volume to that location.
Alternative: Backup-Only Persistence
For better performance, you can keep databases in container storage and only persist backups. All database operations occur in fast container storage, but you must perform regular backups:
$ docker run --rm -p 2480:2480 --name my_arcadedb \
    -v /path/on/host/backups:/home/arcadedb/backups \
    --env ARCADEDB_SETTINGS="-Darcadedb.server.rootPassword=playwithdata" \
    --hostname my_arcadedb arcadedata/arcadedb:26.10.1
The default backup directory is /home/arcadedb/backups. You can customize it with -Darcadedb.server.backupDirectory=/mybackup. Remember to execute regular BACKUP DATABASE operations.
| The optimal strategy depends on your infrastructure. "Local storage" performance characteristics vary between bare metal, virtual machines, and container orchestration platforms. |
Comprehensive Persistence Example
Mount multiple directories for complete data, backup, log, and configuration persistence:
$ docker run --rm -p 2480:2480 --name my_arcadedb \
    -v /path/on/host/databases:/home/arcadedb/databases \
    -v /path/on/host/backups:/home/arcadedb/backups \
    -v /path/on/host/log:/home/arcadedb/log \
    -v /path/on/host/config:/home/arcadedb/config \
    --env ARCADEDB_SETTINGS="-Darcadedb.server.rootPassword=playwithdata" \
    --hostname my_arcadedb arcadedata/arcadedb:26.10.1
Relocating the configuration directory
The server keeps its configuration files in /home/arcadedb/config: server-configuration.json, the users, groups and API
tokens (server-users.jsonl, server-groups.json, server-api-tokens.json), backup.json, ai.json, mcp-config.json and
gremlin-server.yaml. Since v26.10.1 you can move them with arcadedb.server.configDirectory, for example onto the volume that
already holds the databases, so a single mount persists both:
$ docker run --rm -p 2480:2480 --name my_arcadedb \
    -v /path/on/host/arcadedb:/data \
    --env ARCADEDB_SETTINGS="-Darcadedb.server.databaseDirectory=/data/databases \
                     -Darcadedb.server.configDirectory=/data/config \
                     -Darcadedb.server.rootPassword=playwithdata" \
    --hostname my_arcadedb arcadedata/arcadedb:26.10.1
Keep in mind:
-
Pass the setting as a
-Dproperty (here throughARCADEDB_SETTINGS). Setting it inserver-configuration.jsonhas no effect, because that file is itself read from the configuration directory. -
The server creates the directory if it does not exist, but it does not copy the files shipped in the image’s
config/directory into it. If you rely on one of them, such asgremlin-server.yamlfor the Gremlin plugin, copy it over yourself. -
Logging is not affected:
arcadedb-log.propertiesis still loaded through-Djava.util.logging.config.file.
Tuning
The image sizes the JVM heap as a share of the container’s memory limit (-XX:MaxRAMPercentage=75),
so in most cases there is nothing to tune: give the container the memory you want ArcadeDB to have and
the heap follows.
The image also selects generational ZGC through ARCADEDB_OPTS_GC. See
JVM settings inside a fixed memory budget for how the heap share and the collector are chosen, and
why a heap pinned with -Xms equal to -Xmx inflates the memory the container reports.
$ docker run -m 4g ... arcadedata/arcadedb:latest
Since v26.9.1 the heap is sized from the container limit. Earlier images pinned it to 2 GB
(-Xms2G -Xmx2G), which meant a container limited to less than about 2.3 GB was killed at startup
before the server came up.
|
To set the heap explicitly instead, override ARCADEDB_OPTS_MEMORY:
$ docker ... -e ARCADEDB_OPTS_MEMORY="-Xms800M -Xmx800M" ...To run ArcadeDB with RAM <800M, it’s suggested to tune some settings.
You can use the low-ram profile to use the least memory possible.
$ docker ... -e ARCADEDB_OPTS_MEMORY="-Xms800M -Xmx800M" -e ARCADEDB_SETTINGS="-Darcadedb.profile=low-ram" ...